Thursday 1 August 2019

vRealize Orchestrator SSL Certificate

This post deals with installing signed SSL certificates on vRealize Orchestrator 7.6.

I've set up two 7.6 Nodes and joined them into a cluster. These use a Postgres database so no SQL required. I browse to the Control Center to configure SSL Certificates. Apparently my notes say replacing the SSL certificate on the first node fixed the second node, let's see if that's still the case!

We browse to Certificates.

I'll now import my CA Root certificate here

You can browse to the CER file next 
Once imported your appliance will trust certificates issued by your CA. 

The generate option in the next Tab only changes the details on the self signed certificate. It doesn't generate a CSR, very wierd!! I can import a PEM certificate but I'll need to generate it with OpenSSL. 

Here is the openssl.cfg file I used:

[ req ]
default_bits = 2048
default_keyfile = rui.key
distinguished_name = req_distinguished_name
encrypt_key = no
prompt = no
string_mask = nombstr
req_extensions = v3_req
[ v3_req ]
basicConstraints = CA:false
keyUsage = digitalSignature, keyEncipherment, dataEncipherment
extendedKeyUsage = serverAuth, clientAuth
subjectAltName = DNS:labvro01.lab.local, DNS:labvro02.lab.local
[ req_distinguished_name ]
countryName = IE
stateOrProvinceName = IRL
localityName = Dublin
0.organizationName = Lab
organizationalUnitName = IT
commonName = labvro01.lab.local

I then created a PEM file from three files in the following order:

labvro01.lab.local.pem

Contents of Key File - labvro01.lab.local.key
Contents of new signed certificate file - labvro01.lab.local.cer
Contents of Root Cert from CA - Lab_Root_CA.cer

The cert appears on the second node automatically. I'll test the FQDN now using the different interfaces.


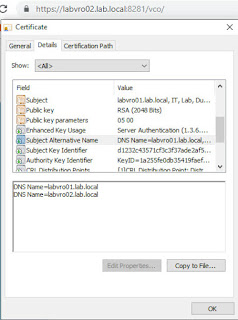
The certificate gives an error in Firefox but looks fine in Chrome. 

Note: the Control Center URL on port 8283 is not signed by this certificate so you will still get warnings etc. This post deals with the VCO client. 


Monday 29 July 2019

vRealize Orchestrator SSL Certificates

This post will go about replacing the Certificates on a pair of vRealize Operations Manager 7.5 Nodes. This is them:

And this is the Certificate current in use:
Nothing to see so far. Cool dark background though isn't it?!

Now, if we examine the current certificates, here is my first vROPS Node:


And here is the second:
Seems all vROPS Nodes get this name and if you added a third node you would get vc-ops-slice-3. Exciting!!! 
So, there is an "/Admin" url you can go to and there is where we'll upload the PEM file. Of course we've to create it first but let's have a look at that area. This is my cluster health in this view:
Now, where is the SSL certificate option hidden you may ask?! Have a look up the top RIGHT of the screen and there's a sneaky option up there. 

Now we can view the current certificate. 

And upload a new one. 

Now, we'll need that PEM ! 

The order of the certificates is the key once again. This is version 7.5 I'm working out of for reference. As per previous entries I have OpenSSL installed on my Windows Server that acts as a Certificate Authority. The opeenssl.cfg file I used is as follows:

[ req ]
default_bits = 2048
default_keyfile = rui.key
distinguished_name = req_distinguished_name
encrypt_key = no
prompt = no
string_mask = nombstr
req_extensions = v3_req
[ v3_req ]
basicConstraints = CA:false
keyUsage = digitalSignature, keyEncipherment, dataEncipherment
extendedKeyUsage = serverAuth, clientAuth
subjectAltName = DNS:labvrops1.lab.local, DNS:labvrops2.lab.local
[ req_distinguished_name ]
countryName = IE
stateOrProvinceName = IRL
localityName = Dublin
0.organizationName = Lab
organizationalUnitName = IT
commonName = labvrops1.lab.local

I then opened a command prompt and issued the following command:

openssl req -new -nodes -out C:\OpenSSL-Win64\bin\labvrops1.lab.local.csr -newkey rsa:2048 -keyout C:\OpenSSL-Win64\bin\labvrops1.lab.local.key -config C:\OpenSSL-Win64\bin\openssl.cfg

I used the Web Server template on the CA, nothing else special. I named the file labvrops1.lab.local.cer. Now I've three files to combine

I ran this command to put them in a PEM file in the right order:
(vROPS Certificate + Key + Root Cert)
type labvrops1.lab.local.cer labvrops1.lab.local.key lab_root_ca.cer > labvrops1.lab.local.pem

Next I uploaded the PEM file to the first vROPS node and it decoded it as follows:

Refresh the page to reload and then view the current certificate:


Now, if you check the second node and refresh there you'll find it's using the same certificate so there's nothing further to do!! Job completed!! 


VMware Log Insight SSL

This post will detail how to replace the self signed certificate on the 3 node Log Insight version 4.8 Cluster in my Lab.

Here is my cluster. I join some of them with an IP but it shouldn't matter:

Here is the SSL option under Configuration in the Administration section detailing the PEM requirements. Replacing the cert here has it copied to all nodes (as far as I recall) so it's a one step process, once you get the PEM certificate correct!


So, I've installed OpenSSL on my Domain Controller where my CA is. I need to generate a certificate request in order to sign it. I use OpenSSL to do this, then sign with the Windows CA, then I can export a PEM from that.

The OpenSSL binaries can be installed from here:
https://slproweb.com/products/Win32OpenSSL.html

The file C:\OpenSSL-Win64\bin\openssl.cfg should be backed up and then replaced with the following contents adjusted for your environment:


[ req ]
default_md = sha512
default_bits = 2048
default_keyfile = rui.key
distinguished_name = req_distinguished_name
encrypt_key = no
prompt = no
string_mask = nombstr
req_extensions = v3_req
[ v3_req ]
basicConstraints = CA:false
keyUsage = digitalSignature, keyEncipherment, dataEncipherment
extendedKeyUsage = serverAuth, clientAuth
subjectAltName = DNS:lablogi1.lab.local, DNS: lablogi2.lab.local, DNS: lablogi3.lab.local, DNS: lablogi4.lab.local, DNS:192.168.10.30, DNS:192.168.10.31, DNS:192.168.10.32, DNS:192.168.10.33, IP:192.168.10.30, IP:192.168.10.31, IP:192.168.10.32, IP:192.168.10.33
[ req_distinguished_name ]
countryName = IE
stateOrProvinceName = IRL
localityName = Dublin
0.organizationName = Lab
organizationalUnitName = IT
commonName = lablogi1.lab.local


You need to replace the values to reflect the FQDN and IPs you are using plus the correct owner details. Yes you need the IP to be listed twice, once as a DNS entry and again as an IP entry!

Now I can execute the command below in the C:\OpenSSL-Win64\bin directory and generate a CSR / Certificate Request File.


openssl req -new -nodes -out C:\OpenSSL-Win64\bin\lablogi1.lab.local.csr -newkey rsa:2048 -keyout C:\OpenSSL-Win64\bin\lablogi1.lab.local.key -config C:\OpenSSL-Win64\bin\openssl.cfg


I've now got two new files, a .key file and the CSR. We'll open the CSR file and use it to generate a certificate from the CA. Browse to the CA web server http://localhost/certsrv if you're on the CA itself.
Click Request a Certificate
Click Advanced Certificate Request....
Click Submit a Certificate.....
Paste the CSR contents and choose the Web Server template

Click Base64 encoded and the Download certificate
We download this and name it lablogi1.cer and you should have the following file at this stage:
Last step - to create a PEM file I used the following command:

type lablogi1.lab.local.key lablogi1.cer lab_root_ca.cer > lablogi1.pem
(sequence is: key file, then loginsight signed certificate file, THEN the CA root cert)

Now I can upload the PEM to Log Insight. You can get hold of the CA Root cer from the download certificate chain link earlier and then open the certificate, drill into the folder to see the Root Cert and perform an All Tasks, Export, Base-64 encoded X.509 (.CER) option.

Note: I was following other blog posts including VMware's. I couldn't believe how many I'd to go through to get the one that worked. They each had a different way of loading the PEM file. The one I'm listing worked for me but if my approach fails and you get an error uploading the certificate to Log Insight, head to google and try another like I did. It may be down to the version of Log Insight or some other reason but it was very frustrating!! 


Now we've a signed certificate on our node. I should be able to browse to the VIP FQDN:


That's it! You can now browse to any of the four FQDN's to verify you are seeing a trusted and signed certificate. 


Friday 26 July 2019

SSL Certificates - vCenter 6.5 with integrated PSC

This will hopefully be a series of posts about deploying signed certificates from a Server 2016 Enterprise CA to a variety of VMware Solutions. I've been installing such certs in a number of VMware Products recently and thought it might be useful to capture the process a bit here.

With vCenter, there are the default self signed certificates of course. VMCA issues self signed certificates to the hosts it manages and you can control the renewal of these.

For signed certificates, you have three main routes:

  • Use the CA to issue certificates to each of the vCenter components and to each ESXi host
  • Use the CA to issue a subordinate certificate to vCenter VMCA and let it sort out the rest!
  • Use the CA to issue certificates to user facing vCenter components and let VMCA handle the rest - HYBRID *VMware's recommended option*
My preference is the Hybrid approach as it's less work, less hair pulling and really deals with the issue of man in the middle head on - it's the people facing admin interfaces which you want to protect most of all. The other interfaces are either not used by admins ever or in the case of the ESXi web interface, rarely. Like when you power down vCenter and have to go searching for which host it was last seen alive on...! 

A lot of customers who have security officers won't be happy with the subordinate CA approach as it gives the VMCA (vCenter's integrated certificate authority) a LOT of power to issue any certificates it like under the Root/Intermediate branches. That can be abused. They usually just say NO! 

They also say no to any wildcard certificates being used. They are handy as you can issue the same cert to multiple products and various common names but it's a fudge and bad security practise. Great for a Lab maybe but not Development and definitely not Production. 

So, assuming Hybrid is the way you want to go, here is the procedure. I'm using vCenter 6.5 update 1 here as I happened to have a nested lab with this version ready to go.

By the way the Blog about Hybrid is here:
Also a walk through is here:

Now, here is my current vCenter SSL certificate (out of the box). Note the 10 year expiration and the path says the issuer can't be found. This is because in a proper CA environment, every time you browse to a secure site you should be able to check in with the CA to see if that particular certificate has been revoked, very important in a security context if the certificate has been compromised. A self signed doesn't do that. 
 

Now we need a new template on the 2016 Server CA for VMware. Duplicate the Web Server one as shown. Click start, run, type in MMC and add in the"Certificate Templates" snap-in to get this UI.
A little bit of editing is required. Set the Certification Authority to Windows Server 2008 and Update the template display name. 


Edit Key Usage and set "Signature is proof of origin (nonrepudiation)


Click Ok and this time edit Application Policies to remove Server Authentication entirely. Check Supply in the request is set in the Subject Name tab. Click OK to save.


Now we need to issue the template. Bring up server manager and from the Tools drop down menu choose Certification Authority. Right Click on Certificate Templates, Click New, Certificate Template to Issue. Select your template and Click Ok.


Now, the handiest way I'm used to issuing certificates is with the old web interface on Server 2016. When you install a CA role it should give you this web enrollment option.

When you browse to http://localhost/certsrv or to this URL remotely and authenticate it will provide you the familiar UI to request and issue certificates. The current setup doesn't wait for approval although this is certainly the way a Production CA would operate so build in some time in your project to allow for certificates to be signed and issued and check for typos before you send in the request or you will have wasted some time in the process. A certificate request can be decoded via openssl or most commercial CA authorities have a web tool so you can check its all spelled correctly. 

Click on Download a CA certificate, certificate chain, or CRL Choose Base 64 and Click Download CA certificate. You now have certnew.cer - keep this somewhere handy. 
Enable SSH to your vCenter - if you haven't already done so browse to 
https://<vCenter FQDN>:5480
You can enable SSH and the Bash Shell in here. 


Putty to the vCenter IP / FQDN and we can start to interact with the VMCA. 


I've changed to the shell interface, set the default to shell so we can use WinSCP later to upload certificates and started up the certificate-manager. We're going to replace the Machine SSL certificate. Option 1 looks like this:

Now load up a copy of WinSCP and connect to vCenter and grab /tmp/vmca_issued_csr.csr and the /tmp/vmca_issued_key.key just in case! 

Back to the certificate web server request page. Click Home and then Request a Certificate. Click advanced certificate request. 


Click the second link, I'm not typing that in here....!!
 
 Edit the vmca_issued_csr.csr in Notepad++ (Get this, it's worth it!) or just use old Notepad from windows. Paste the entire contents into the saved request field below and choose you template we made earlier.
 At this stage in a lab we get our certificate immediately. Change to Base 64 and Click Download Certificate and rename it to something after you vCenter, in my case I called it Labvc2.cer.

If you did this directly on your CA Server, don't start looking for the cert on your local desktop, copy it off the CA server first!!!! Now, remember that certnew.cer root cert from earlier, we need to add that to the signed certificate as the VMCA doesn't have a clue about the CA, this way it's told to trust the certificate and here's the CA cert to prove it's legit. 
Edit the Labvc2.cer and paste the contents of certnew.cer at the bottom, no spaces please....
Upload the file to vCenter along with certnew.cer with WinSCP and we're back to Putty again to install them. I've called my chained certificate Labvc2_SSL.cer. 


Now I got an error first time which was because I'd already registered NSX and vCloud Director with this vCenter, ideally you would replace certificates BEFORE deploying other solutions. The error was in /var/log/vmware/vmcad/certificate-manager.log and stated:
ERROR certificate-manager 'lstool get' failed: 1
Fix:
https://kb.vmware.com/s/article/2150057
https://kb.vmware.com/s/article/1025360

After removing those plugins I tried again:


Success!! That's it. You can verify the certificate is signed for both the Flash and HTML5 interfaces. The appliance :5480 one is not part of the Machine SSL so don't worry about that one....