HP Cloud Service Automation - Part 2
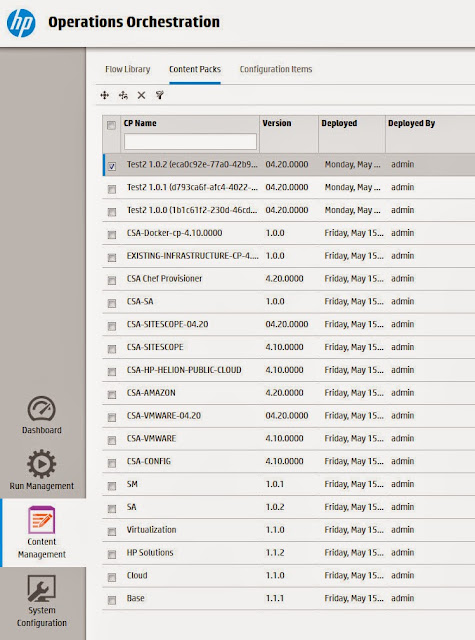
Once you have HP OO installed and integrate CSA you'll notice a lot of CSA content packs appear in OO, the demo appliance I'd assume has this setup already but a vanilla OO install only has a few to start with otherwise. When you use the Topology Designer it injects system generated flows into OO which reflect the new Topology Designs - 1 for each version (Apologies for the massive screenshots from OO!):You can deploy updated, new and custom content packs into OO and reference them in CSA but more frequently when using the sequenced designer. That designer gives you much more control BUT is harder to configure. The new Topology Designer as you can see above is more "integrated" and easier to use BUT doesn't let you do much "outside the box". It will improve in future versions of CSA I'm sure but you will need to understand the limitations of Topology Designer and when using the Sequence Designer makes sense. Read the Concepts guide if you haven't already! I'm still learning about the differences myself!
To integrate with vCenter you need to start by logging in. I've provided some URLs from my Lab below which can be adjusted for your environment, sometimes you need particular port numbers to work which can be annoying if you forget what they are so bookmark the ones in your lab before you forget!!
https://hpoo10.lab.local:8443/oo/login/login-form
https://hpcsa.lab.local:8444/csa/login
https://hpcsa.lab.local:8089/org/CSA_CONSUMER
You should be able to make out from the names above which appliances (OO/CSA/Marketplace) I'm referring to. The demo appliance will probably make it easier with a single IP or Hostname.
Now in CSA get to the logon screen (the second url above):
The view below shows CSA 4.2 which looks slightly different from 4.1.
Then go to Providers and select VMware vCenter on the left and click Create on the bottom right:
Enter the information for your vCenter as shown, the Service Access Point and appropriate account to access vCenter is required. I've used the VMware SSO account but an AD one is also viable, best create one specifically for CSA with a long password but for a Lab, keep it simple! Change the image if desired, I don't think the consumers ever see it though. Now click on the Create button and then select the new Provider entry. Edit the DATACENTERNAME property (Edit button on the far right)and match the value to your Datacenter in vCenter.
Next go to the top level menus again and select Designs, Topology, Designer. Click Create and enter a name for the Service Design and decide a starting version number
You can leave Tags alone on the next screen and select an appropriate icon and Click Finish. This will bring you into the Editor where we will place our two components and configure them. Click an empty space in the editor and you will see a cursor with a plus sign beside it. The Create Node window pops up and you can scroll down to select vCenter Server and provide a new name for this item if you wish. The Properties on the right now need to be serviced. The ones we HAVE to modify are shown with a red asterix on them. The values I used are as follows (Change the Template and Customization Spec to your Lab values):
Name: vCenter Server
cpuCount: 1 (Select Modifiable during service creation)
memorySize: 4096 (Select Modifiable during service creation)
vmTemplateReference: 2012R2 Std Template
vmNamePrefix: Cloud-
customizationSpec: Server 2012 - no domain
vmFolder: Cloud
username:
password:
privateKey:
Next click into the designer to add a second component "vCenter Network Interface", a little to the left - 1 square or so away and enter the properties below (Change the Port Group name to your Labs one):
Name: vCenter Network Interface 1
portGroupName: VM Network
networkInterfaceType: VmxNet3
Now we need to link the two objects. Move them so they are 1 square apart if they are not already and if you hover over the middle left of the Network property you'll see a clear circle. Click on this and hold the left mouse button while moving over to the corresponding circle on the middle right of the server object, let go of the mouse button to link the two up. So we've two components, both are needed or the server won't get on the network until we've joined them up. With everything connected you should have no Errors or Validation Errors anywhere in this view. Click Save.
Next go back to Overview and Click Publish and Click Yes to confirm. As it says you can't edit this afterwards, for further modifications you would have to make a new version and go from there.
Let's do a test run and see how it operates (and if it works!). Fill out the Modifiable Properties with other values if you wish or just click Finish to execute it. Click View. Keep an eye on HP OO under Run Management and also vCenter itself and you'll see if the VM actually gets deployed.
If all goes well you'll see a Cloning Operation commencing and you'll know that the vCenter Provider connection is good and if your Design stands up or not. Give it time to apply Customizations so it could take around 12-15 minutes based on my Lab, be patient!! I've also a DHCP server running so it will get an IP Address.
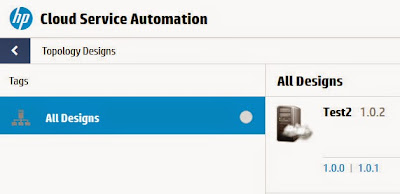
Click Cancel to Undeploy the VM and you're done! That takes a lot less time (16 seconds in my lab!)You can still do test runs of earlier versions of the Design but you have to select the exact version by clicking on the version number when selecting the Design from the list. (Clicking 1.0.2 below would select that version and you could do a test Run against it for comparison if the later one failed).
You can also go deeper into OO to see the flow steps and if any errors / failure occurred, where. I didn't select the correct network driver the first time - I entered "VMXNET 3" as it's listed in the VM properties in VMware but OO doesn't recognize that as shown below:
While we have selected Publish against this Design, it's not actually visible to anyone yet, you also have to publish an Offering which references that Design. This is where you assign costs, who can gets to see it, approval flows and so on. We'll cover that in the next Post!
Note: Observe the names of some of the Properties such as "portGroupname" or "cpuCount". See where the capital is, pay attention to it as if creating custom flows this becomes critical!
The vCenter task below is shown below for reference:
Notice the VM Name? It also appeared in my "Cloud" VM Folder which was nice! The VM got a DHCP IP Address but the random name could be an issue, it is unique but could the NetBIOS name be friendlier? Otherwise a successful, pingeable first run!


