Thursday 18 June 2020

Patching vCenter

Patching vCenter


Sometimes you need to deploy a very specific vCenter build. For example SimpliVity requires it for integration and doesn't support versions not tested yet. Take the compatibility guide below.
So I wanted to deploy build 15132721. I had a look at the versions of vCenter I had to hand and what I could download from the patch site. I could get build 13843380 full appliance version and then grab the patch to build 15132721, or so I thought. I went onsite and found after I deployed the base build, it would NOT accept the patch. I was in a black zone so I retreated to find out more. Upon researching this I found out that you can't cross the streams....i.e. you can patch within updates but NOT cross between them. My base version was 6.7 U2 and the patch was for 6.7 U3b. While it is a rollup patch, it is ONLY a rollup for 6.7 U3 deployments. See VMware documentation states the following:


"VMware makes patches available on a monthly basis. These patches can only be applied in between major releases of vCenter Server Appliance. For example, patches released for the initial release of vCenter Server Appliance 6.7, are not applicable to vCenter Server Appliance 6.7 Update 1, as any patches previously made available will be included with the Update 1 release."

So, now I wanted to know what were my options. If you have a full MyVMware account you can download a full build of vCenter 6.7 U3b build 15132721 all ready to go. That's what I did in this case.

My question is its possible to still deploy my vCenter with just patch site downloads? So, I would deploy with update 2 and upgrade it to update 3 and then update 3b? Two stages in total, and I was just missing one patch in my earlier scenario if so. I deployed the base build 13843380 to my lab and found the following:

Here is the appliance upgrade checker with file VMware-vCenter-Server-Appliance-6.7.0.42000-15132721-patch-FP.iso attached:

And here it is with file VMware-vCenter-Server-Appliance-6.7.0.40000-14367737-patch-FP.iso attached:

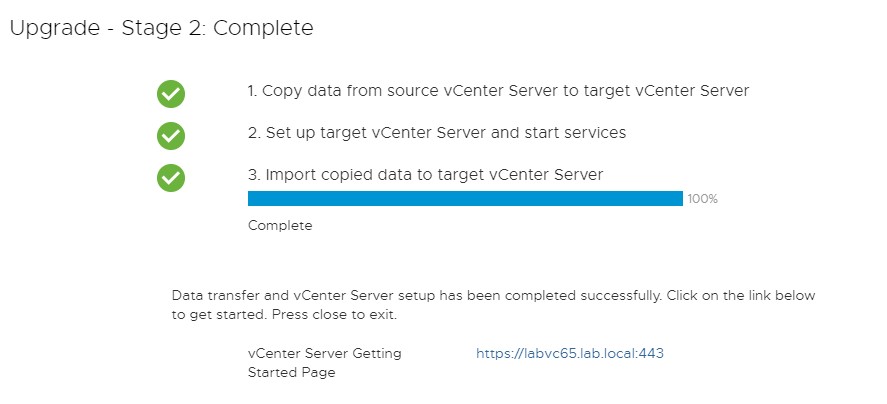
So, I can go from 6.7 U2 to U3 but not beyond. So let's try this two step process as depicted below
So, I updates to U3 fine and then attached the U3b iso and it this time was happy to show the update:
I then validated the desired version had been reached:
 Now the lab vcenter appliance view shows additional patches (it's allowed to as it's on the internet)
So, this is just to help me keep in mind when grabbing patches for vCenter to not assume that cumulative updates will work across update releases, grab the intermediate ones also just to be sure and it possible get the full install for the exact version you're after if you've access to it and the time.

Wednesday 29 April 2020

HPE OneView 5.0 SSL & LDAP integration

HPE OneView 5.0 SSL & LDAP integration


It's been a while since I looked at the HPE OneView Appliance in my Lab.

Note: HPE_OneView_5.00.02_ESXi_Z7550-96801.ova used in this Lab.

I have a need to configure LDAP in a customer site so I thought I'd take a fresh look at this in my lab first and throw in replacing the default self signed SSL certificate while I was at it.

First for the LDAP. This is straight forward enough. About 10 - 15 minutes should cover it. Go to Settings and then Security.

Scroll down and Click Add Directory

You're aiming for something like this. I chose a service account so I'd have a dedicated AD account with a complex password and no password expiration for this purpose. NOTE: do NOT test the OneView Logon with this account, use a different one!! It fails!! 


You will need to add an AD server here, I know DNS is up so I choose the domain name which will resolve to one of the two DCs in my customer environment, here it will only ever resolve to my single Lab AD but the principal is valid. If you rebuild / change AD servers you won't need to revisit this. 


Trust the Cert, Trust the Leaf etc as appropriate.


 Now you should have something like the following:
 Next for permissions. We can try to add a user but we only get a local user option, we can't reference an AD user directly, only an AD Group
 This is the dialog to point to an AD Group:
 You can browse to AD now and pick out the right group which also proves the service account works
 There a few roles - Infrastructure Administrator is the top level one with all permissions.
 That's the one I chose
 I've added in Domain Users here but you'll probably have a more suitable AD group to select
 I changed default directory to lab.local here and it then is the default on the logon page.

The log page is shown below. I'm testing with a different user here as my service account fails to logon, even though its in the same group so be warned! The user1 account worked fine. 
Now, for the Certificate.

There are two main steps - import your root / intermediate certs from your CA, then generate a CSR and import the signed certificate.

Go to Security and you see where it states Manage Certificates? This is where you import your CA root and intermediate certificates. It's NOT for importing your oneview signed certificate! Click into Manage Certificates.
Now we click on Add certificates. The top one listed is just a self signed one you can ignore. 
Now get your Root Certificate in Base 64 and paste it in here. I've ticked the box just to be sure. Click Validate.  
Click Add

Now add in any Intermediate CA Certificates the same way. My CA is now listed below. 

Back into Security and click on Create appliance certificate signing request
Fill in the top half detail, the bottom half is optional. 

Copy the CSR and get your CA to sign it. 

 On the previous menu click on Import appliance certificate and paste in the signed base-64 data

Give it 2 minutes and you're done! 

Now, just two Caveats - the errors below I'd encountered before getting the order of business above sorted out so to save you a headache here's how to avoid: 

 The Server 2019 CA web server template I'd used to originally sign the CSR didn't have the required attributes. I thought it was only missing the client authentication element but my screenshot below indicates it was worse than that. I duplicated the web server template, added in both elements and then published the new template so I could re-request and sign the CSR and paste in the required elements, then it worked.


 The other issue was I went straight to the oneview cert and didn't import the root certificate first. That's when I got the following error: 

If you follow my steps above you'll avoid this.

That's it - 2 minutes later and you're running on a signed certificate for your OneView Appliance version 5.02. Hope this helps somebody!!


Tuesday 28 April 2020

vSphere 7.0 - New Features (VM NVMe Defaults and Shared VMDK disks)

vSphere 7.0 - New Features (VM NVMe Defaults and Shared VMDK disks)


This post looks at some of the differences / new features for VMs in vSphere 7.0.

When creating a new VM vCenter still defaults to Server 2012 R2 for some reason! With this you get the typical setup, E1000 and LSI SAS scsi controller etc:

Now if we choose Server 2016 we start to see a change here. VMware vSphere 7.0 now point you towards the NVMe (NVM Express) Controller by default. This is certainly a change. Pity they leave the E1000 as the default network driver! So, the NVMe Controller is a play which moves beyond the Paravirtual Storage Controller Driver which I use for specialised VMs that were heavy on storage - SQL, Exchange etc. Currently it's not NVMe all the way down the SCSI stack but maybe in future versions - we'll see what way that plays out in the next year or two I guess.

This is Server 2019 and it also uses NVMe as the default Storage Controller with E1000 again for the networking.
Note: For this and Server 2016 that 90GB is the default OS Disk Size, it used to be 60GB.
This is the VM after editing - it still has a SATA Controller for the CDROM and up to 15 NVMe drive spaces:
You can specify up to 4 NVMe Controllers so that gives you 60 virtual disks to play with....

So you can now use Shared VMDK Disks instead of RDMs for Windows Failover Clusters as in this version VMware added SCSI-3 support at the VMDK level. There is a path to migrate RDMs - here is the link:
https://storagehub.vmware.com/t/vsphere-7-core-storage/shared-vmdk/

There are a few caveats - like for me Lab that is - it's supported on Fibre Channel arrays ONLY!! Not something I have lying around currently.....! I checked the Datastore properties but the "Clustered VMDK" option is not present on my system. Looks interesting though, maybe they will extend it to iSCSI at some point? Sorry I can't go into it in more detail here though......!

Upgrading to ESXi 7.0

Upgrading to ESXi 7.0


This post will look at upgrading two ESXi hosts to 7.0.

Note: One of my nested ESXi hosts kept dropping off the network, even during the vCenter upgrade but didn't cause an issue. I found duplicate DNS entries from an old lab I did previously on my Domain Controller so vCenter was getting the wrong IP address, deleted the old entries and that seemed to help. After it dropped a few minutes later I removed and re-added it into vCenter.

So I created an ESXi 7.0 Baseline and attached it to the cluster and ran the remediation pre-check. I just uploaded the full ESXi 7.0 ISO for this baseline.


I clicked remediate and watched it go
First attempt failed as the hosts wouldn't go into maintenance mode. Did that manually and retried.
 So the upgrade went fine and I manually pulled the hosts out of maintenance mode afterwards.
The baseline checks are now all green as there are no patches for 7.0 yet.

That's the hosts done. It will be interesting to see how the Lifecycle Manager works with future 7.0+ patches.

You can even check for vCenter updates from here:

Simples! In my next post I'll call out a few new VM defaults and the new shared VMDK disks that replace RDMs in Windows Failover Clusters....!

Monday 27 April 2020

Upgrading to vCenter 7.0

Upgrading to vCenter 7.0


So here I'll try a few different upgrade realities to get to vCenter 7.0 and see how things fare. Firstly check your release notes.
https://docs.vmware.com/en/VMware-vSphere/7.0/rn/vsphere-esxi-vcenter-server-70-release-notes.html
Next are you using vCenter 6.7U2c or 6.7U3 with an external platform services controller - you need to upgrade to 6.7U3a first.
https://kb.vmware.com/s/article/74678
If you coming from a Windows Server (There is NO windows vCenter 7 version anymore!!) make sure all Windows Updates have been applied and are not pending - disable updates if you have to.
Using Oracle for Database? Check the release notes for the good news!

So, let's try a few things. I installed a windows vCenter 6.0 U3a which is NOT compatible. I created an embedded deployment and tried upgrading it to vCenter 7.0 for kicks. This is what happened:

 I chose Upgrade and entered in the source appliance details and got this:


Next I created an appliance based external deployment - 1 x PSC, 1 x vCenter using 6.5 U3f.


The next part of the wizard was interesting - should I reuse the old VC VM name or will it impact the FQDN? From my reading this is just the name of the VM in vCenter - if you use a version digit in the name this is a way you can update that so I chose Labvc70 over Labvc65 just to see what would happen. I expect the VM to have a FQDN of Labvc65.lab.local still but we'll see how it turns out...!

So, the new vCenter VM deployed fine
 No surprises here:
 This is interesting, if you have a larger topology:
 Usual option:
 All looks good here:
 Interesting comment about decommissioning the old PSC which we'll get back to later:
 All fine here. It kept the old FQDN but the VM is now called Labvc70 in vCenter.
So, it powered down Labvc65 and used the VM name Labvc70 which can be handy. The FQDN is maintained and it's an embedded PSC now. But what about Labpsc01 - the KB indicates you need to do further work. Can I just power the damn thing off? 
Firstly, let me check AD integration. 
So, the old PSC is still listed and is AD integrated but the new vCenter 7 isn't. This needs to be configured before I mess with the PSC. Don't forget to reboot the new vCenter appliance. 

So, am I using the embedded PSC or the old labpsc01?
So, I'm ok to remove the old PSC now....
I've a ! in my password which caused the command to fail - make sure you surround your password with ' ' if you have special characters or you'll get the same error I did up above! 

So to sum up - to get rid of the old PSC - power it down, then run the command on the new vCenter that has the embedded PSC and you're good to go!